
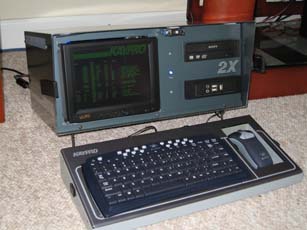
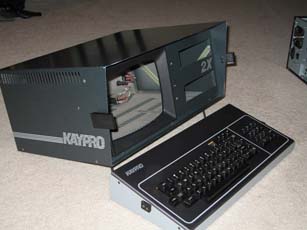
This is the Kaypro


We submitted pictures of our Kaypro to MaximumPC magazine's Rig of the Month contest. The Kaypro was featured in the Holiday 2008 edition. Here is a link to the article. The PDF is kind-of big, so it may take a while to download.
Table of Contents
- Top
- Step 1: Taking out the Guts
- Step 2: Melding with the Modern
- Step 3: New Guts
- Step 4: Homemade Mounting Brackets
- Step 5: Final Touches
- Step 6: Maintenance
- Back to Home
If you don't recognize this type of computer, you will probably just think it looks kind of strange with a built in keyboard, monitor, and mouse. If, however, you do recognize it, you were working with computers in the early 1980's and are wondering why it looks different in comparison to the original computer that bore the name Kaypro. It looks different from the original Kaypro because it is a gutted out Kaypro 2 rebuilt from the motherboard up.
Step 1: Taking out the Guts
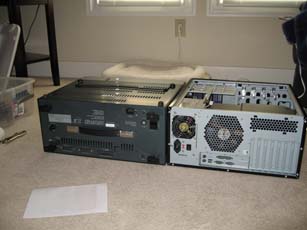
The first step involved completely removing all inferior technology from the case and buying a modern case from which we took mounting brackets. Anything that was permanently connected to the case came out through a little bit of coaxing, and we did end up saving some of the original metal brackets for use later in the project.
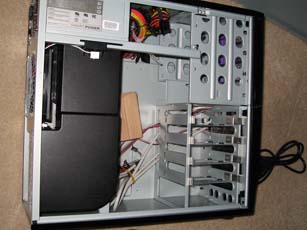
Step 2: Melding with the Modern
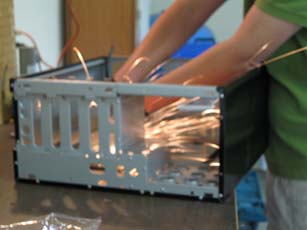
We used a dremal to coax out the power supply and the motherboard mounting bracket from the modern case. The stresses of cutting through metal turned out to be too much for our older dremal, so we purchased a newer one that could cut through the extra thick Kaypro case. With a little bit more coaxing we were able to install the new brackets into the Kaypro.
Step 3: New Guts
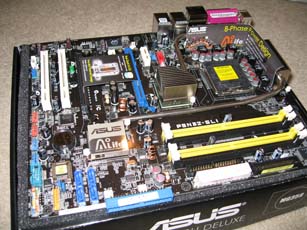
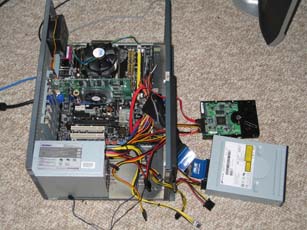
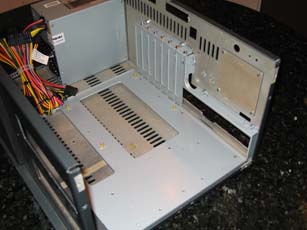
We used a regular ATX board in the Kaypro as well as a Pentium D Processor and a 250 GB Hard Drive. We later replaced the power supply shown in favor of a more powerful one, and changed out the underpowered CPU Fan seen in the picture. Although now fully functional, we still had to mount all of these parts into the old case.
Step 4: Homemade Mounting Brackets
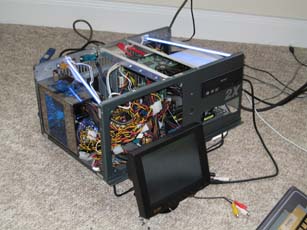

Since we were rebuilding a computer and not using a prefabricated case, it was necessary to construct new brackets to fit into the cramped spaces of the old computer. Luckily, DVD drives still use about the same mounts as floppy drives did in the 1980's, so it was possible to take the old mounting brackets for the floppies and with some cutting use them for the DVD drive and front panel. We also found a small monitor to replace the original Kaypro screen. The hard drive was the hardest to mount, but eventually we just took two metal rods and hung it from the top of the case.
Step 5: Final Touches
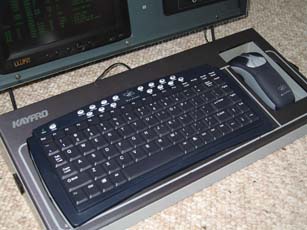
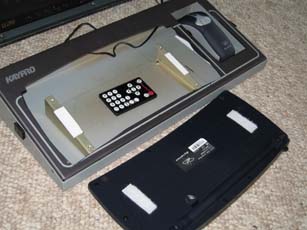
To finish off the actual computer we added some lights to the inside and added a front panel which included USB and FireWire ports. The major final touches we added were the keyboard and mouse. The original Kaypro had a handle on the back and a keyboard that folded up and latched onto the case; these two innovations made it one of the first portable computer (it still weighed quite a lot). We wanted to replicate this, so we gutted out the old keyboard tray and added in slopped supports with Velcro. We then got a keyboard and a gyration mouse that you simply move through the air. We attached the keyboard and the mouse charger on with Velcro and the mouse was strapped onto its charger. We also ran a USB wire through the tray to charge the mouse.
Step 6: Maintenance
The hard drive recently went out, so we ordered a larger 320 GB hard drive. We suspect the hard drive was to close to the top of the case and overheating, so we are going to lower it a little.